Wide-Legged Forward Fold C & D (Prasarita Padottanasana): Open Shoulders, Hooked Toes
Prasarita Padottanasana C and D close out the wide-legged section of the Ashtanga standing sequence, and they are where this pose stops being only about hamstrings. C hands the work to your shoulders. D hands it to your fingers. Same stance, same hinge, two entirely new demands — and both of them reveal habits that A and B allowed you to hide.
Everything from Wide-Legged Forward Fold A & B still applies here: the stance width, the outer edges of the feet parallel, the fold coming from the hip creases rather than the waist. If those are not settled yet, practise A and B on their own for a week before adding these two.
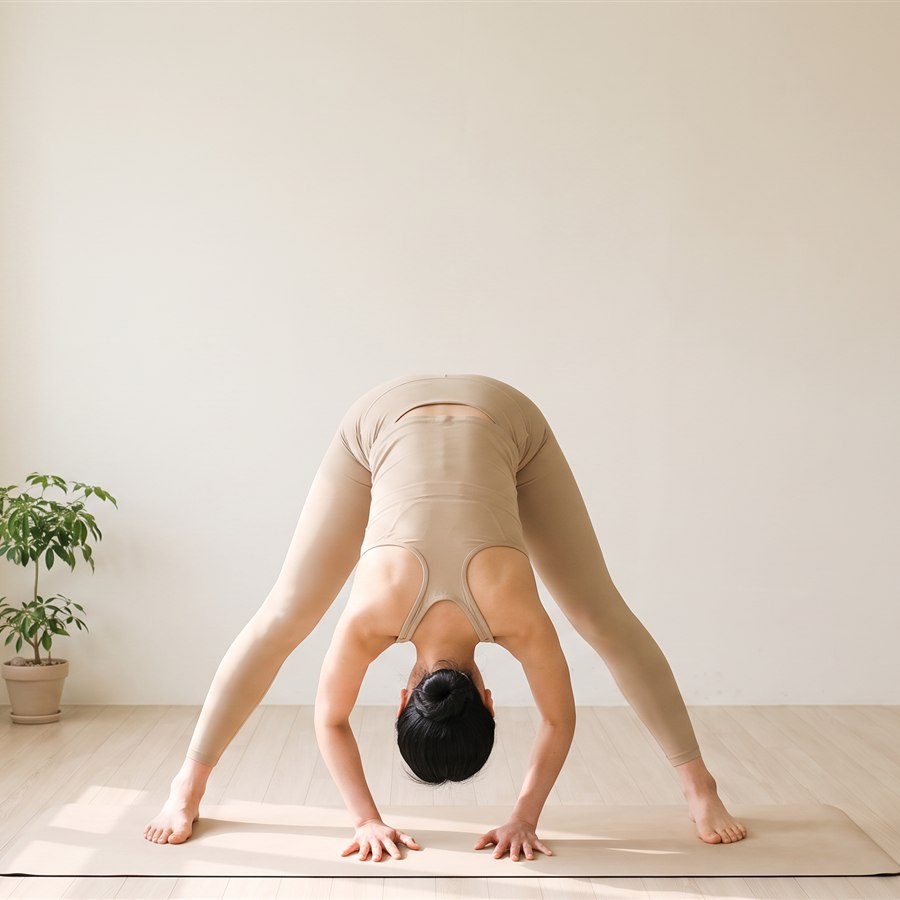
Prasarita Padottanasana - feet wide and parallel, hips over the heels, crown of the head reaching toward the mat
What C and D actually are
Prasarita means spread out or extended, pada is foot, and uttana means an intense stretch. Put together: an intense stretch with the feet spread wide. In the Primary Series the pose appears four times in a row, labelled A, B, C and D. The stance never changes between them. What changes is what the arms are asked to do, and each variation asks a different question of you.
C is the shoulder variation. You interlace your fingers behind your back, straighten the arms, and as you fold the hands travel up and over your head toward the floor in front of you. Nothing pulls them there except gravity and whatever range your shoulders honestly have. For most beginners the hands stop well above the head, which is completely normal.
D is the grip variation. You fold, hook your big toes with the first two fingers of each hand, and use that hold to draw yourself deeper. It is the first moment in the standing sequence where your arms actively pull you into a fold rather than simply propping you up. That turns a passive stretch into an active one, which is why it comes last.
Step-by-step: Prasarita Padottanasana C
Like the other three variations, C is five vinyasas in the counted method: in, out, five breaths, in, out. Practically, that means you enter on an exhale and leave on an inhale.
- Stand in the same wide stance you used for A and B — roughly one leg-length between the feet, outer edges parallel, weight even between both legs.
- Exhale and take both hands behind your back, interlacing the fingers. If the hands do not meet comfortably, hold a strap or a rolled hand towel between them instead.
- Inhale, straighten the arms, draw the shoulder blades gently toward each other and lift the chest. Look slightly upward. This lifted position — not the fold — is where the shoulder work actually begins.
- Exhale and hinge forward from the hip creases, keeping the legs firm and the kneecaps lifted. Let the arms travel over your head toward the floor beyond it. Do not push them; let them fall as far as they fall.
- Stay for five breaths with the crown of the head reaching toward the mat and the hips staying over the ankles rather than drifting back.
- Inhale and come all the way up with a long back, arms still straight behind you.
- Exhale and release the hands to your hips.
The shoulders in C: what is really moving
The movement in C is shoulder extension — the arms travelling behind the body — and almost every beginner tries to fake it in one of two ways. The first is arching the low back and flaring the front ribs, which makes the hands look lower without the shoulders having moved at all. The second is shrugging: the shoulders creep toward the ears, the neck shortens, and the whole thing turns into a gripping contest.
The correction for both is the same. Before you fold, knit your lower front ribs down toward your hips and slide your shoulders away from your ears. Then fold. The hands will almost certainly travel less far — and that lower position is the real one, the one that changes over months of practice.
Step-by-step: Prasarita Padottanasana D
- Come up to standing in the same stance with your hands on your hips.
- Inhale, lengthen your spine and look gently upward.
- Exhale, fold from the hip creases and take hold of your big toes — the first two fingers of each hand wrapped around the toe, thumb pressing down on top. This grip is often called the yogi toe lock.
- Inhale, straighten your arms, lift your chest and look forward with a flat back. This is a real position, not a pause.
- Exhale, bend your elbows out to the sides and draw the crown of your head down toward the mat between your feet, pulling gently on the toes.
- Stay for five breaths, keeping the weight slightly forward toward the balls of the feet so the hips stay stacked over the ankles.
- Inhale, straighten the arms and look up with a flat back again.
- Exhale to settle, then inhale, release the toes, bring the hands to the hips and rise with a long spine.
Where else you will meet this grip
The two-finger toe hook is not unique to D. It is the same grip you used in Padangusthasana at the start of the standing sequence, and the same one you will use later in the seated part of the series in Supta Padangusthasana, the reclining big-toe pose. If reaching your toes while standing is still out of range, that reclining version is the honest place to build the grip — no balance to manage, and no temptation to round the spine to get there.
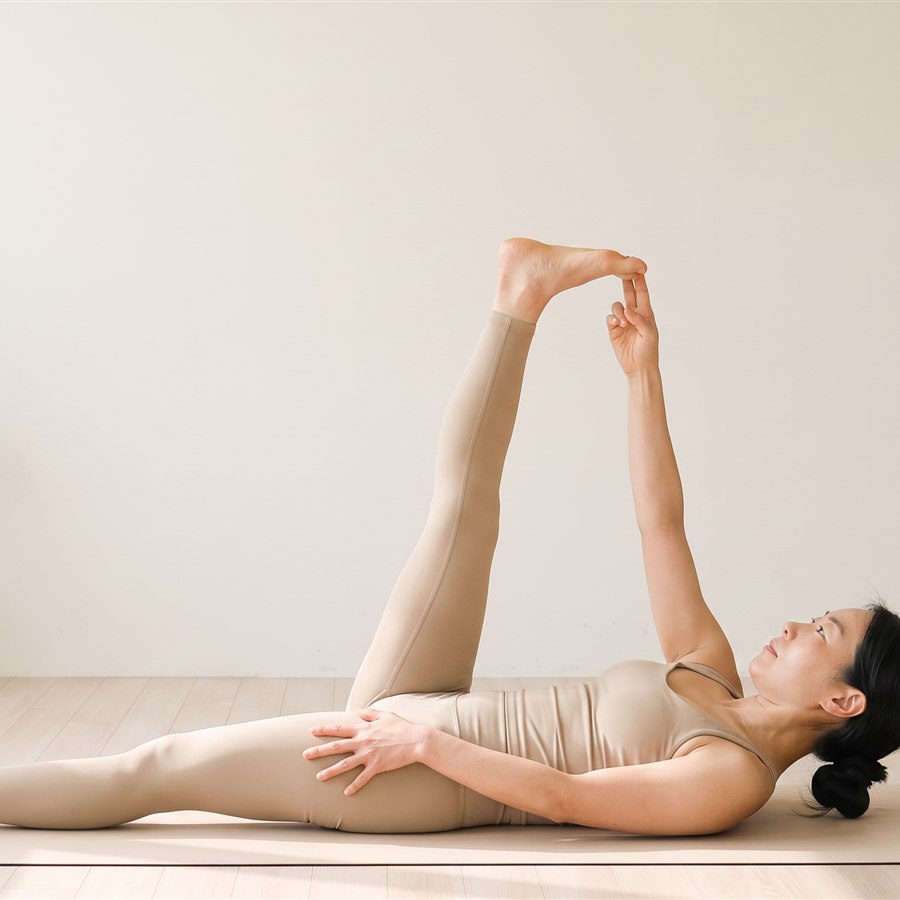
Supta Padangusthasana - lying on the back, big toe hooked by the first two fingers with the thumb pressing on top
Breath and gaze (drishti)
Keep the same steady ujjayi breathing you have used throughout the standing sequence — a soft, audible sound at the back of the throat, in and out through the nose, with the exhale as long as the inhale. Five breaths in each variation, counted honestly rather than hurried.
The drishti for both C and D is nasagrai, the tip of the nose. Once you are folded, that gaze happens almost by itself if you keep your neck long and let the head hang rather than craning it to look between your feet. If you are checking how close your head is to the floor, you have left the drishti — and usually the breath with it.
Common mistakes
- Widening the stance to get the head down. A wider stance lowers your head without opening anything. Keep the stance you can hold with straight, active legs, and let the head arrive when the hamstrings allow it.
- Letting the weight fall into the heels. The hips drift backward, the fold shallows, and the low back takes the load. Shift a little weight toward the balls of the feet so your hips sit over your ankles.
- Pulling hard in D with a rounded back. The arms are strong enough to drag you into a shape your spine did not agree to. Pull only as much as you can while the length in the front of your body stays.
- Forcing the hands down in C. Pushing the arms overhead by arching the back trades a shoulder stretch for low-back compression. Ribs down first, then fold, and accept where the hands land.
Beginner modifications
For C, hold a strap, belt or towel between the hands instead of interlacing the fingers, and let the hands sit wider than shoulder width. Over weeks, walk the hands closer along the strap; this variation commonly changes faster than anything else in the standing sequence.
For D, if the toes are out of reach, bend your knees generously and take the toes anyway — bent knees with a long spine teach far more than straight legs with a rounded back. Or hold your ankles or shins, or place a block under each hand. In both C and D, a folded blanket under the crown of the head lets you feel the finished position without straining toward it.
When to be careful
Both variations put your head below your heart, so move slowly in and out if you have high or low blood pressure, and come up on an inhale rather than snapping upright. If you have glaucoma, a detached retina or recent eye surgery, skip deep head-down folds and ask your doctor first. C asks a lot of the shoulders — with a shoulder injury or after shoulder surgery, use the strap or leave the hands on the hips. If your hamstrings or low back are irritable, bend the knees rather than pushing to straighten them. During pregnancy the wide stance is often comfortable, but deep forward compression usually is not, so work with a teacher who knows your situation.
C and D turn the wide-legged pose into a whole-body proposition rather than a hamstring test. Tomorrow we move on to Parsvottanasana, the intense side stretch — where the feet come back toward each other, the hips have to square up, and the reverse-prayer hand position gives your shoulders their next honest conversation.
🧘 Want to practice this pose right now? Open our interactive guide with photos, alignment details and a breath timer: Ashtanga Shala Practice Guide.
This post is general guidance, not medical advice. If you have an injury or health condition, check with a professional before practicing.


